With Truckin Digital, you'll stay in control of your entire brokerage, improve communication and collaboration, reduce downtime, and ensure compliance with industry regulations. Our feature-rich solution is tailored to meet the specific demands of the transportation industry and is supported by a dedicated customer support team.
1.To purchase Brokerage addon go to select profile picture in the top right corner and select addons from drop down menu.

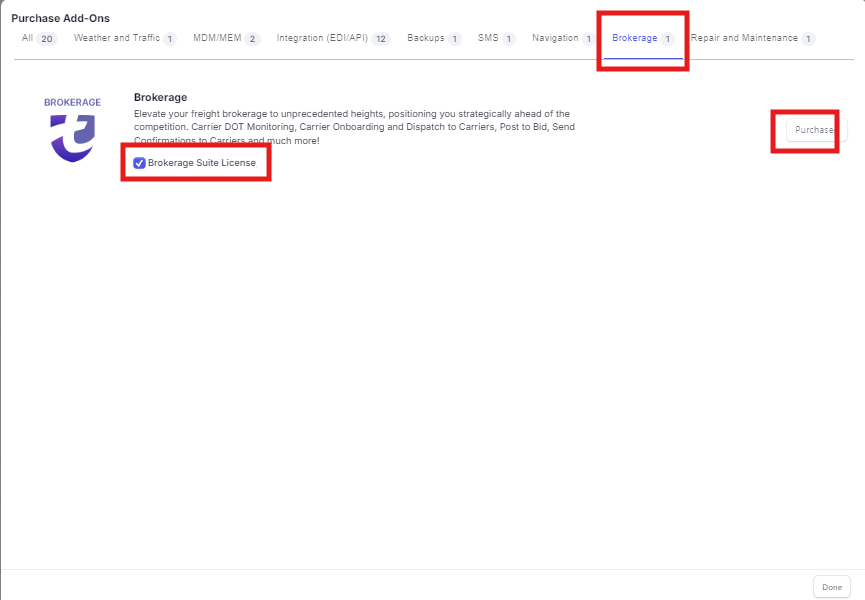
2. A popup window will appear where you should select the Brokerage tab, then check the Brokerage Suite License checkbox, and finally click the Purchase button.
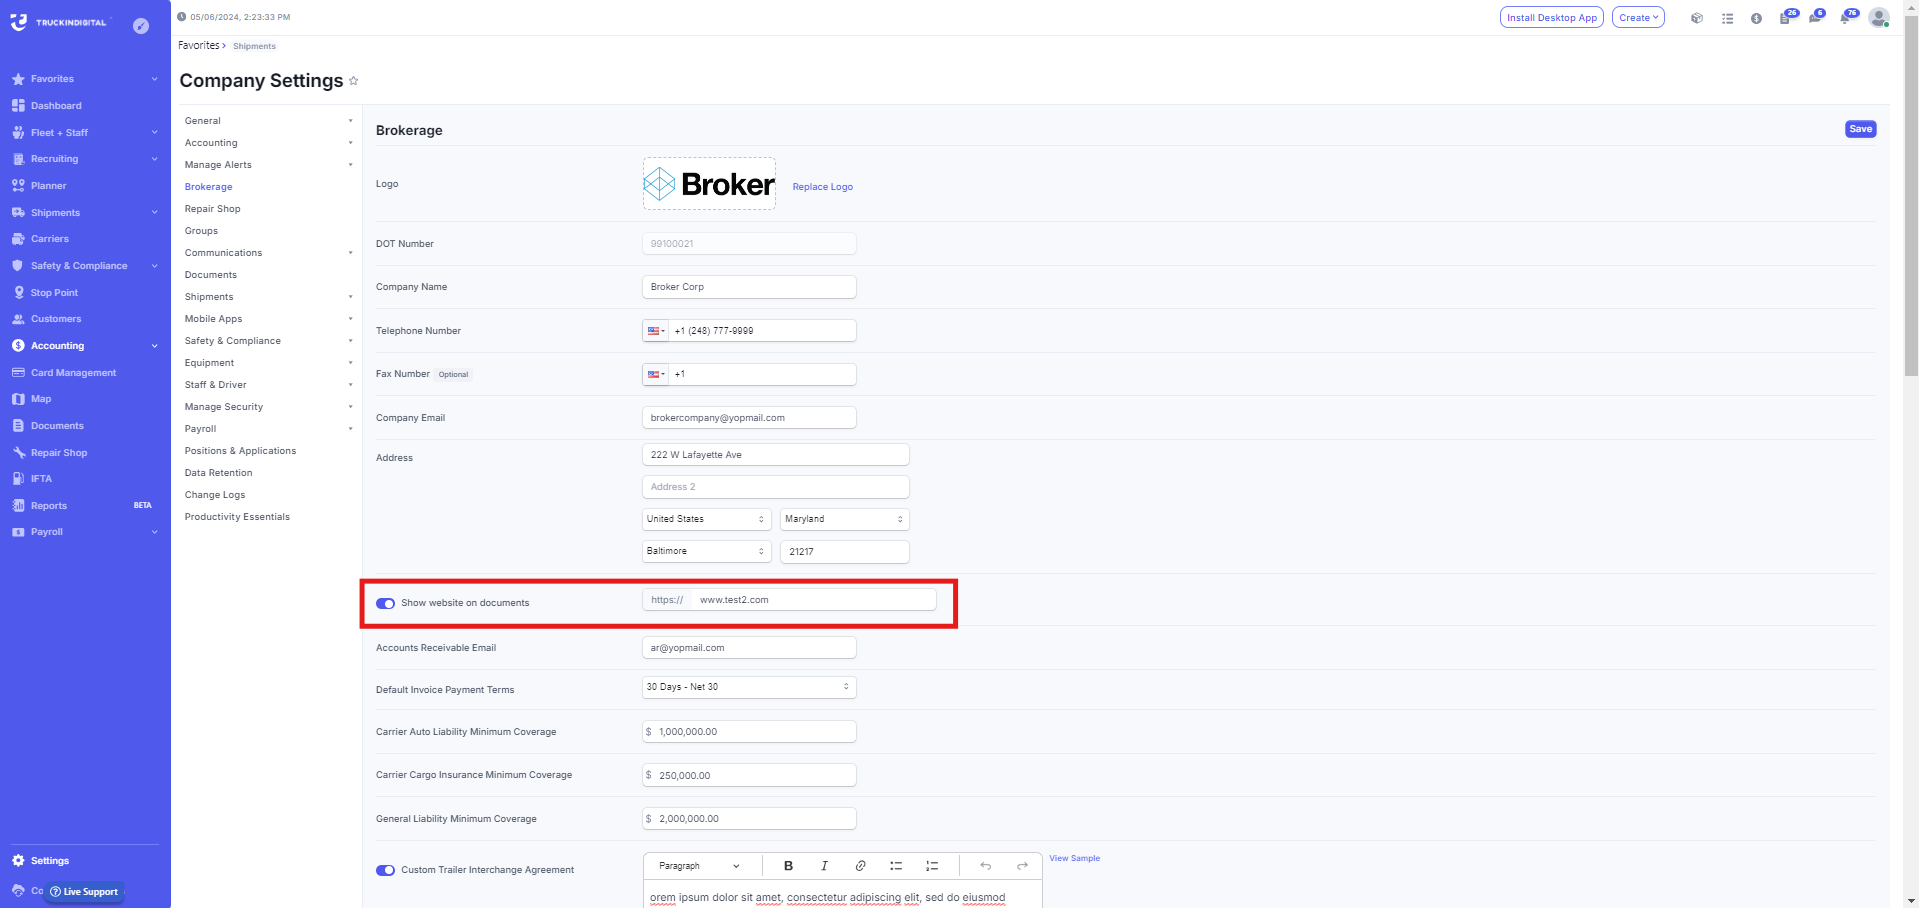
3. After that, you will unlock the Brokerage options in Company Settings. Here you will have to put all of your Broker information.

4. Once in the Brokerage tab in the Company Settings, you'll be prompted to fill all necessary data about your brokerage company.
Starting with the basic information of your company, such as adding a logo, registration of your DOT number, filling the details of your Brokerage company will be required when adding this feature.

5. You are also able to show your website address on documents which will be seen by carries and customers.

6. As we move on when filling in the data for your brokerage company, there will be also options to predefine your coverages, set up an email for your accounts receivable and setting up your default invoice payment terms from the drop down menu 
EXAMPLE, FOR THE PAYMENT TERMS, PLEASE NOTE THAT THESE ARE PRELOADED PAYMENT TERMS, YOU CAN ADD YOUR OWN. 
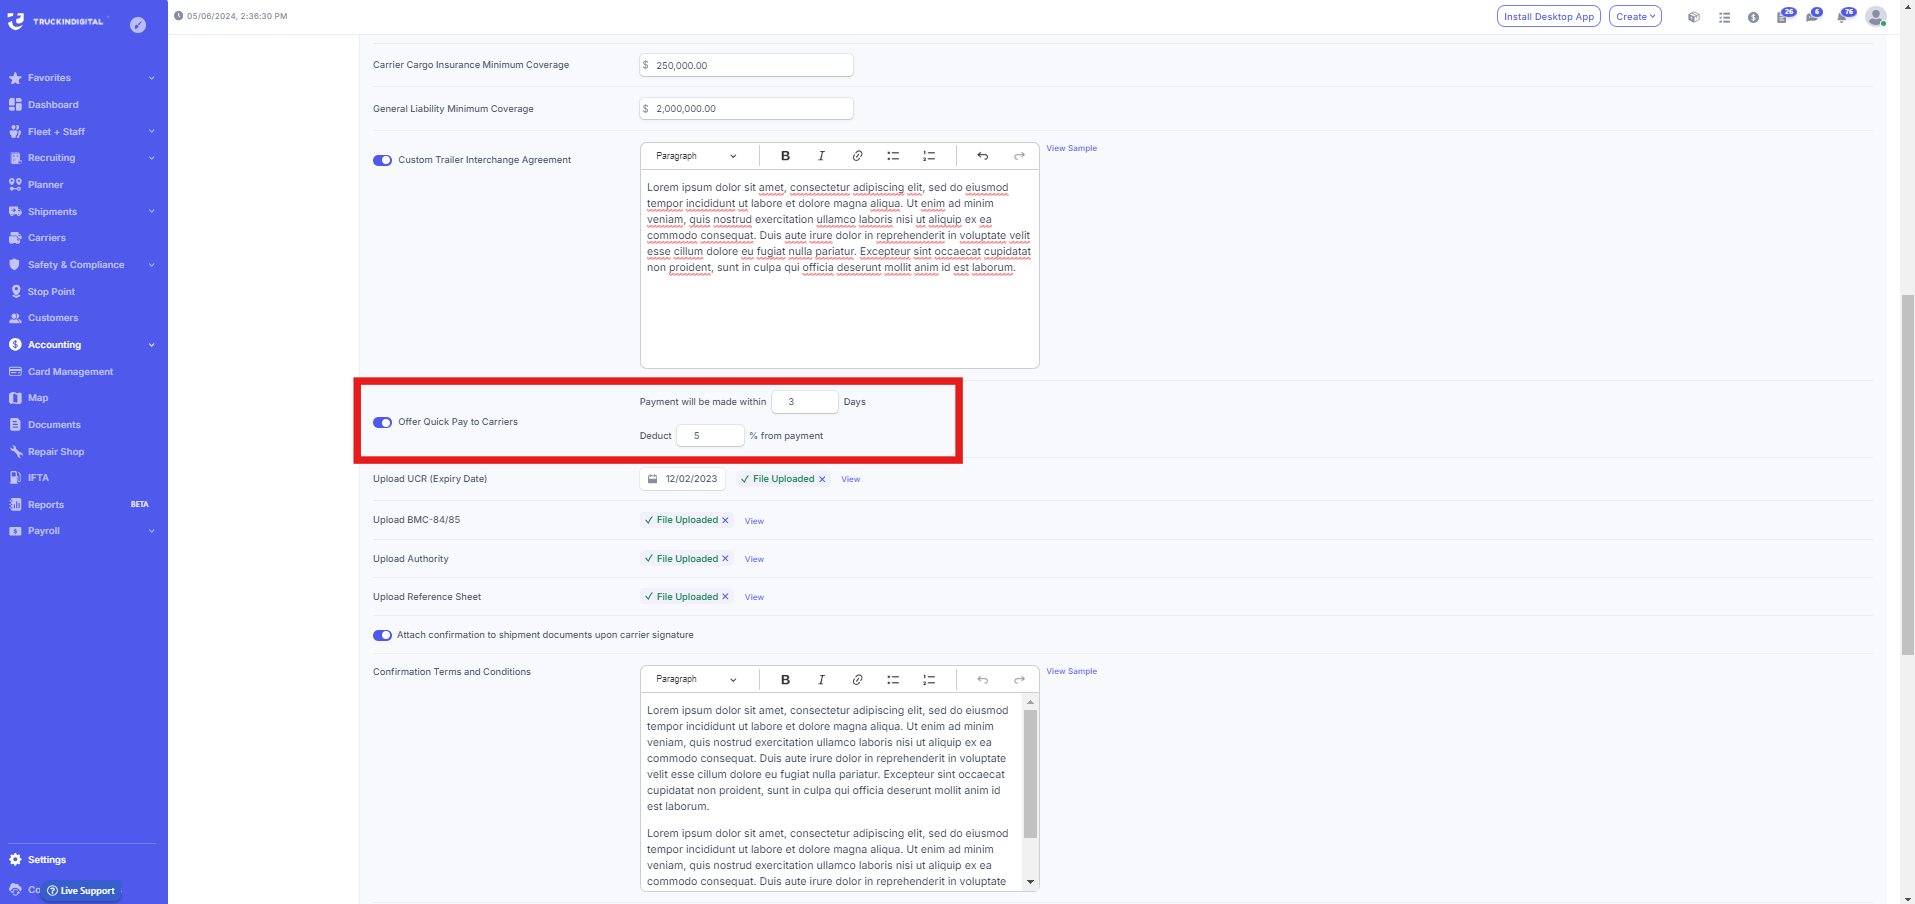
7. You can toggle on the Custom Trailer Interchange Agreement which you'll fill out with the appropriate text, once you've done this it will be shown in the Carrier Master Agreement.

8. You can toggle on option to Offer Quick Pay to Carries. When enabling this option, the system will deduct Quick Pay on the confirmation including appear the terms with set number of days, and percentage set do be deducted from the payment including your own bills section.

9. You'll be prompted to attach documents such as UCR and set an expiry date, BMC-84/85, Authority and Reference Sheet. This will provide a packet for your carriers after they onboard.

10. You can also predefine the option for system to automatically attach confirmation to shipment documents.

11. After setting the Confirmation Terms and Conditions with adequate text for both Terms and Conditions and Carrier Master Agreement, same as for the Custom Trailer Interchange Agreement it will be shown in the Carrier Master Agreement as part of the Carrier Onboarding Process.

12. The last part of setting up the Brokerage addon is to add the First and the Last Name of the person, most probably the CEO of your brokerage company, including the title and the eSignature, which will all be shown in the Carrier Master Agreement.

See Carrier Onboarding Process how the above comes together for a Carrier.
Was this article helpful?
That’s Great!
Thank you for your feedback
Sorry! We couldn't be helpful
Thank you for your feedback
Feedback sent
We appreciate your effort and will try to fix the article